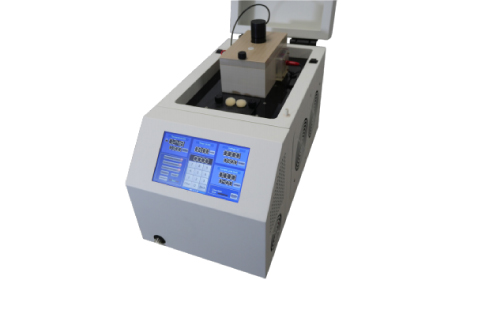
SmartBatch+:
New high-throughput system for rapid active tissue clearing and immunolabeling.


SmartBatch+ combines active tissue clearing, leveraging our new
Clear+ system, and active immunolabeling into one turn-key batch tissue processing device! Now you can clear and label up to 12 whole mouse brains in just one day.
An advance on our founder’s CLARITY method, Clear+ tissue clearing provides maximum optical transparency with no tissue expansion; eFLASH and patented SE technologies then uniformly label whole
organs from surface to core.
FEATURES & HIGHLIGHTS
Multi-functional: SmartBatch+ switches between clearing and labeling modes simply by changing buffers.
Fast, uniform labeling: Our system uses eFLASH technology (bioRxiv 2019), combining SWITCH (Cell 2015) with our patented stochastic electrotransport (SE, PNAS 2015) method to uniformly label intact tissue volumes.
Cost-effective: SmartBatch+ uses just 4-20 μg of antibody pertarget to label a sample the size of a whole mouse brain, and requires <12 mins hands-on time per sample.
High-throughput: Our device can actively clear or label up to 12 whole mouse brains, 2 whole rat brains, or comparably sized samples per batch.
Ideal for light sheet imaging: Combined with SHIELD tissue preservation, SmartBatch+ protects fluorescent protein signal, antigenicity, and molecular & physical architecture through all tissue processing steps.
TISSUE CLEARING
Combining electrophoretic clearing with our Clear+ tissue clearing method, a rotating electric field drives charged SDS micelles into samples for quick and uniform delipidation. Clear+ is the only known technique to produce no change in sample morphology after clearing. Compatible with different tissue types and large intact samples, SmartBatch+ clearing takes minutes to set up and 1 day to complete.


Before delipidation After index-matching After immunolabeling
IMMUNOLABELING
Recently published advances on our patented SE method enable antibody diffusion without surface saturation and uniform labeling throughout intact volumes. SmartBatch+ also uses an order of magnitude less antibody than passive clearing methods such as iDISCO and CUBIC.
To date, we have validated and optimized >50 antibodies, providing coverage of popular targets related to neuroscience, cancer, development, and disease.
OUR OPTIMIZED TISSUE
PROCESSING PIPELINE:
Exceptional tissue preservation with SHIELD
High-throughput, active tissue clearing using our Clear+ system with SmartBatch+
Active immunolabeling with SmartBatch+
Refractive index-matching with EasyIndex to optically clear samples
Rapid, high resolution light sheet imaging with SmartSPIM
Publication-quality data analysis outputs with SmartAnalytics


Refer to the timeline above. The red dot indicates a stopping point. If you are not ready to add the samples to the device after the overnight incubation step, simply leave the samples in Delipidation Buffer until you are ready. The samples will delipidate passively in the meantime.
1. Incubate the samples in Delipidation Buffer for 24 hours at 45°C with light shaking. If you do not have a 45°C incubator then 37°C is preferable to RT. This step can be extended safely if needed, but do not skip it. This can be done with 20mL of buffer in a conical tube for each sample, or altogether in an Incubation Jar:
a. Fill an Incubation Jar with ~250 mL of Delipidation Buffer. This buffer can be set aside and re-used for incubations until you run out of the rest of the buffer for the device.
b. Insert SHIELD fixed samples into Mesh Bags, taking note of which sample is in which bag. When inserting mouse brains into the bags put the cerebellum facing down to avoid damage to olfactory bulbs.
c. Place the Sample Ring on the Ring Stand.
d. Hang the Mesh Bags on the Sample Ring and secure them with the Lock Ring.
e. Place the Ring Stand in the Incubation Jar and close the lid.
f. Incubate the jar at 45°C with gentle shaking.
2. Wash the device and turn off Auxiliary Power.
3. Drain out any liquid from the device and ensure the Drainage Valve is closed. Soak up any remaining liquid from the Chamber using a paper towel.
4. Pour a whole bottle of Conduction Buffer into the Chamber.
5. Remove the Clearing Cup from its storage container and wash carefully with a gentle stream of water.
6. Place the Clearing Cup into a beaker of distilled water for several minutes to finish washing the cup.
7. Remove the Clearing Cup from the liquid and dump out any water. Carefully use a kimwipe to soak up any remaining water inside.
8. Fill the cup with 35mL of Delipidation Buffer.
9. If you have not loaded the samples into the Mesh Bags, do so now with the cerebellum down to avoid damaging the olfactory bulbs. Then hang the bags on the Sample Ring, using the Ring Stand to help and secure them with the Lock Ring.
10. Rest the Sample Ring on top of the Clearing Cup with the samples inside the cup. Add more Delipidation Buffer if the samples are not fully submerged.
11. Insert the cup in the Chamber, lining up the pegs on the bottom with those in the Chamber Hex Piece. The cup will fit in snugly.
12. Turn on the Auxiliary Power.
13. Close the Chamber Lid and secure it with the thumbscrew.
14. Close the Case Lid.
15. Press “Preset” until it indicates Clearing Mode. Change any settings or apply the timer if desired. The preset settings are the recommended settings for all tissue types (35V, 1250 mA current limit, 42°C).
16. Turn on the Electrophoresis Power.
17. Wait for your samples to clear. For mouse brains, run for 30 hours. For rat brains, run for 6 days, and refresh the Delipidation Buffer every 2-3 days. Smaller samples can be delipidated faster, but this should be determined empirically.
18. Once fully delipidated, turn off Electrophoresis Power and Auxiliary Power.
19. Open the Case Lid and Chamber Lid and remove the Clearing Cup from the Chamber.
20. Remove Sample Ring from the Clearing Cup and place on the Ring Stand. Carefully rinse the Clearing Cup with distilled water and store it in its storage solution. It is important to keep the membrane hydrated at all times. We recommend refreshing the storage solution every few months. More can be made here.
21. The Conduction Buffer has a lifetime of about 10 days of electrophoresis power. This lifetime only counts if electrophoresis power is on. Once the 10 days has been reached, wash the system and replace the buffer. We recommend refreshing the Delipidation Buffer when adding new samples, or every ~3 days, whichever comes first.
22. Always wash the device before turning it off to prevent detergent buildup.
23. If the 10 day lifetime has not been reached, drain the Conduction Buffer back into the bottle for later use.
At this point, the samples can be stored in the Incubation Jar with PBSN (PBS with 0.02% sodium azide) at 4°C until you are ready to proceed (see timeline below). The samples can remain in their Mesh Bags if you plan to immunolabel.


Refer to the timeline above. The red dots indicate optional stopping points. If you are not ready to move on to the next steps, move the samples to PBSN (PBS with 0.02% sodium azide) at 4°C until you are ready to proceed.
Before starting this step it is vital to plan out what antibodies will be used and with what method of secondary. The protocol can accommodate staining with dye-conjugated antibodies, simultaneous delivery of primary along with monovalent Fab fragment secondaries, and sequential delivery of primary and secondary (can be Fab or IgG). Please consult the Validated Antibody List for more information as we have found that some antibodies require specific secondary delivery schemes. If you anticipate a signal being dim, we recommend sequential delivery of secondary using whole IgG secondaries in the 647 nm channel. If you are planning to use an antibody for the first time, we recommend first following the Antibody Validation Protocol. If you wish to skip that step, we recommend using a sequential delivery of primary and secondary for the first test since simultaneous Fab fragments can change the binding affinity of the primary antibody. It is also recommended to try new antibodies with single samples first, as batch experiments can require large amounts of antibody.
You can deliver as many antibodies or dyes as you want at once without any host or wavelength conflicts so plan ahead for that. If you are delivering a nuclear dye or vasculature stain, please add them during this primary step. In general, we recommend using higher wavelengths (red or far red) for antibodies and saving lower wavelengths for brighter targets or nuclear dyes.
Protocol: Day 0 – Pre-Incubation
On the day before you plan to start labeling (or on a Friday if you wish to start labeling on Monday) incubate the samples in Primary Sample Buffer with light shaking at RT. This can be done individually with 20 mL of buffer in a conical tube or the samples can be prepared on the Ring Stand in their Mesh Bags and incubated in the Incubation Jar with ~225 mL of buffer.
Protocol: Day 1 – Primary Labeling
1. In the morning, refresh the Primary Sample Buffer.
2. Remove the Staining Sample Cup from its storage solution. Choose the smallest cup that will still allow you to fit all your samples inside to conserve antibody.
3. Use a very gentle stream of tap water to carefully rinse the cup, holding the cup close to the tap. The cups are fragile so do not subject them to high water pressure.
4. Once rinsed out, carefully rinse the cup with distilled water.
5. Place the cup in a volume of distilled water until the later steps.
6. If you are using the Single Sample Staining Cup, get a Mesh Bag from the storage solution, wash it well with water and add it to the distilled water with the cup.
7. Wash the device and soak up any remaining liquid in the Chamber with paper towels.
8. Ensure the Drainage Valve is closed and pour an entire bottle of Primary Device Buffer into the Chamber.
9. Remove the sample cup from the distilled water and dump out the water.
10. Use a kimwipe to carefully soak up any remaining liquid from inside the cup.
11. Carefully pour a small amount of Primary Sample Buffer into the cup and swirl it around to coat the membrane.
12. Dump and discard the liquid in the cup and soak it up again with a kimwipe.
13. Fill the Batch Staining Cup with 40 mL of Primary Sample Buffer. If you are using the Single Sample Staining Cup, fill it with 9 mL of Primary Sample Buffer. The Medium Staining Cup should be filled with 20 mL of solution.
14. Add antibodies / dyes to the Sample Cup, following the considerations listed above. Consult the Validated Antibody List for recommended amounts of antibodies to use. If you are going to use whole IgG secondaries, they cannot be added during this step and must be delivered sequentially. If you are going to use simultaneous Fab fragment secondaries, you should add them to the cup, generally in a 2:1 molar ratio. Please note that IgG antibodies have a MW of 150 kDa, while monovalent Fab fragments have a MW of 50 kDa.
15. We recommend adding 100 μL of Normal Serum for each mouse brain hemisphere you will stain (ie. 200 μL for a whole brain, 1 mL for 5 whole mouse brains, etc.). Use Normal Donkey Serum if you will use donkey host secondaries, and Normal Goat Serum for goat host secondaries.
16. Mix the liquid in the cup well using a fresh pipette.
17. Remove the Sample Ring from the Incubation Jar and place it on top of the Sample Cup with the samples in their Mesh Bags in the cup. If you are using the Single Sample Staining Cup, remove the Mesh Bag from the distilled water, dry it with kimwipes, add the sample to the bag, and put the bag into the Staining Cup.18. Take the sample cup and place it into the Chamber. Line up the hex on the bottom of the cup with the hex in the Chamber. 19. Turn on the Auxiliary Power while the lid is open and ensure that the sample cup rotates and is mixing well.
20. Close the Chamber Lid and Case Lid.
21. Press the “Preset” button until the Labeling 1 preset is highlighted. This changes the settings to 30°C, 90V, and 350 mA current limit.
22. Change the timer to 18 hours.
23. Turn on Electrophoresis and Timed Shutdown.
24. The timer will automatically turn off electrophoresis at the end of the experiment.
Protocol: Day 2 – Primary Washing and Fixing
1. After the timer goes off, primary labeling is complete.
2. Use a pipette to remove ~20 μL of solution from the Sample Cup and pipette it onto a pH paper strip.
3. (Optional) If the pH is still above ~8.0, you will need to extend the duration of the experiment to complete antibody binding. For every 0.1 above 8.0, the experiment should run for an additional hour. So if you measure a pH of 8.2, change the timer to 2:00 (2 hours) and turn on Electrophoresis Power and Timed Shutdown.
4. When the pH has dropped below 8 and labeling is complete, open the device and remove the Sample Cup.
5. For batch labeling, wash out an Incubation Jar and fill it with ~250 mL of PBSN. Then remove the Sample Ring from the Sample Cup and place it on a Ring Stand. Place the Ring Stand in the Incubation Jar and close the lid. Wash the samples until the end of the day in PBSN at RT with light shaking, refreshing the solution at least once.
6. For single sample experiments, prepare a conical tube with ~40 mL of PBSN. Then remove the Mesh Bag from the Sample Cup and place it in the tube. Wash the sample until the end of the day in PBSN at RT with light shaking, refreshing the solution at least once. If your sample contains fluorescent signals, protect from light.
7. Carefully rinse the Sample Cup with distilled water and store it in its storage solution. It is important to keep the membrane hydrated at all times. We recommend refreshing the storage solution every few months. More can be made here.
8. Wash the device before shutting it down. Whether you need to add sequential secondaries or not, we recommend PFA fixing the samples at this point to prevent antibody dissociation. If you are not ready to do an overnight PFA fix, simply keep the samples in PBSN at 4°C until you are ready. Waiting a long time before fixing can result in antibodies dissociating though.
9. At the end of the day, prepare a solution of 4% PFA in 1X PBS. For batch experiments you will need ~250 mL. For single samples you will need 20 mL.
10. For batch staining, remove the Ring Stand from the Incubation Jar and wash out the Jar. Then fill it with the 4% PFA and insert the Ring Stand.
11. For single samples, move the sample from PBSN to a fresh tube of 4% PFA. The samples can remain in their mesh bags.
12. Incubate samples overnight at RT with light shaking protected from light.
Protocol: Day 3 – PFA Washing and Sequential Secondary Labeling
1. If you are ready to complete secondary staining in this day, you can immediately continue to Step 2. Otherwise, move the sample to PBSN (PBS + 0.02% sodium azide) and store it at 4°C protected from light until you are ready.
2. For batch staining, wash out the Incubation Jar and replace the liquid with ~250 mL of Secondary Sample Buffer. For single samples, move the sample to a fresh tube of ~20 mL of Secondary Sample Buffer.
3. Incubate samples for 6-8 hours at 37°C with light shaking, refreshing the solution at least once.
4. Wash the Labeling Cup in the same manner as it was during primary staining.
5. Prepare the device as it was for Primary Staining, with these exceptions:a. After washing the device, pour one bottle of Secondary Device Buffer into the Chamberb. Change the timer to 12:00 (12 hours).
6. Press “Preset” until it indicates Labeling 2 Mode. The preset settings are the recommended settings for secondary antibody staining.
7. Use a kimwipe to carefully soak up any remaining liquid from inside the cup.
8. Carefully pour a small amount of Secondary Sample Buffer into the cup and swirl it around to coat the membrane.
9. Dump and discard the liquid in the cup and soak it up again with a kimwipe.
10. Fill the Batch Staining Cup with 40 mL of Secondary Sample Buffer, Medium Staining Cup with 20 mL, or the Single Sample Staining Cup with 9 mL of liquid.
11. Add secondary antibodies directly to the Sample Cup. We recommend 2:1 molar ratio of Secondary:Primary, but this is antibody dependent and is a good starting point. Consult the Validated Antibody list for more details on specific antibodies.
12. (Optional) Add Normal Donkey Serum or Normal Goat Serum (matching your secondary antibody host) to the cup. For mouse brains we recommend 100 μL per hemisphere.
13. Insert the samples into the cup as before.
14. Take the sample cup and place it into the Chamber. Line up the hex on the bottom of the cup with the hex in the Chamber.
15. Turn on the Auxiliary Power while the lid is open and ensure that the sample cup rotates and is mixing well.
16. Close the Chamber Lid and Case Lid, turn on Electrophoresis, and turn on Timed Shutdown.
Protocol: Day 4 – Secondary Washing and PFA Fixing
1. Open the device and remove the Sample Cup.
2. Use a kimwipe to carefully soak up any remaining liquid from inside the cup.
3. Fill the cup with Secondary Sample Buffer, then discard it. Use a kimwipe again to soak up the remaining liquid. 4. Fill the cup again with Secondary Sample Buffer and place the samples back in the cup.
5. Take the sample cup and place it into the Chamber. Line up the hex on the bottom of the cup with the hex in the Chamber.
6. Turn on the Auxiliary Power while the lid is open and ensure that the sample cup rotates and is mixing well.
7. Change the timer to 3:00 (3 hours).
8. Close the Chamber Lid and Case Lid, turn on Electrophoresis, and turn on Timed Shutdown.
9. Repeat steps 1-8 again.
10. For batch labeling, wash out an Incubation Jar and fill it with ~250 mL of PBSN. Then remove the Sample Ring from the Sample Cup and place it on a Ring Stand. Place the Ring Stand in the Incubation Jar and close the lid. Wash the samples until the end of the day in PBSN at RT with light shaking, refreshing the solution at least once.
11. For single sample experiments, prepare a conical tube with ~40 mL of PBSN. Then remove the Mesh Bag from the Sample Cup and place it in the tube. Wash the sample until the end of the day in PBSN at RT with light shaking, refreshing the solution at least once.
12. Carefully rinse the Sample Cup with distilled water and store it in its storage solution. It is important to keep the membrane hydrated at all times. We recommend refreshing the storage solution every few months. More can be made here.
13. Wash the device before shutting it down.
The secondary antibodies will now be fixed at the end of the day. If you are not ready to do an overnight PFA fix, simply keep the samples in PBSN at 4°C until you are ready. Waiting a long time before fixing can result in antibodies dissociating though.
14. At the end of the day prepare a solution of 4% PFA in 1X PBS. For batch experiments you will need ~250 mL. For single samples you will need 20 mL.
15. For batch staining, remove the Ring Stand from the Incubation Jar and wash out the Jar. Then fill it with the 4% PFA and insert the Ring Stand.
16. For single samples, move the sample from PBSN to a fresh tube of 4% PFA.
17. Incubate samples overnight at RT with light shaking protected from light.
18. Transfer samples to PBSN in the morning to wash out PFA.
19. You are done labeling! You can now continue to Index Matching.